You can let the users sign in with Google into the generated app.
This option provides a simple way to authorize users, as anyone with a Google account can easily log into your app.
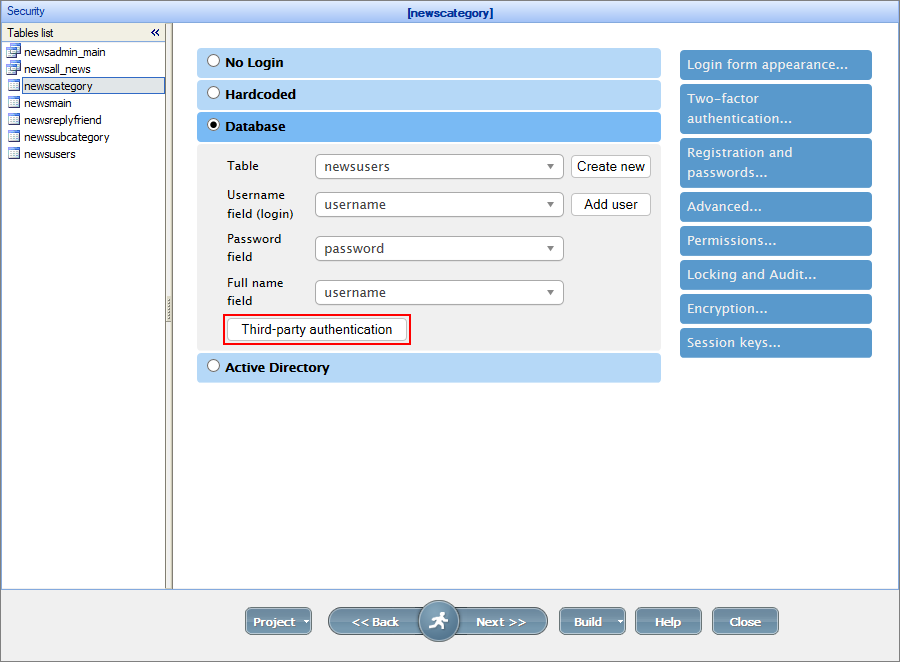
You can access these options by clicking the Third-party authentication option on the Security screen.

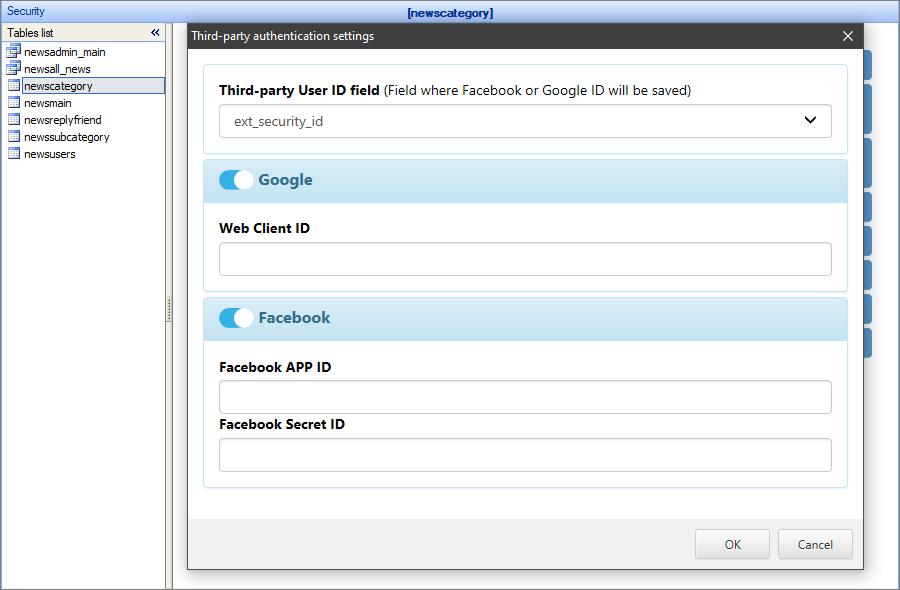
This button opens the window with Google and Facebook authentication options. Use the toggles to show or hide the fields under these options.

The Third-party User ID field is a dropdown where you can select the field to store the Facebook or Google IDs. Choose an existing field or create a new one.
To use the Sign in with Google option, you need to get the Web client ID. Here are the necessary steps:
1. Open the Google Developers Console.
Note: you need a Google account to access the Developers Console. If you don't have it, you can create a new account.
2. Proceed to Credentials -> Create credentials -> Oauth Client ID -> Web application.
Note: if the Web application item is not available, read the instructions on the page on how to enable it.
3. Add the Authorized JavaScript origins. You can modify this list later.
For local testing, add the following:
•http://localhost:8085
•http://localhost:8086
•http://localhost:8087
•http://localhost
For testing using the Demo account, add http://demo.asprunner.net.
4. Click Save to obtain the Web client ID. Copy and paste it into the respective field in the Third-party authentication window.
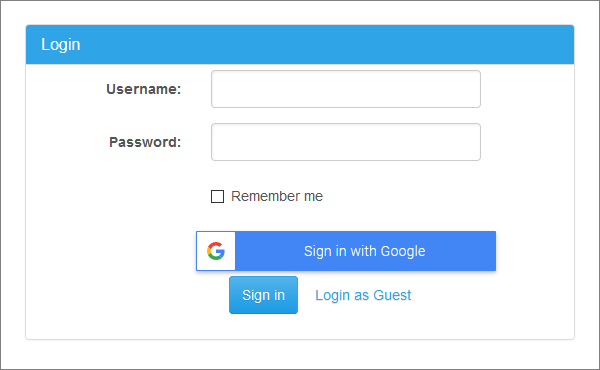
5. After you Build the app, you can see the Sign in with Google button on the Login page of your application.

If you have enabled Dynamic permissions, the Google users are assigned the rights of the Default group: Google users -> Default users.
Security screen articles:
•CAPTCHA on authentication pages
See also: