Quick jump |
What is a Master-details relationship?
A one-to-many relationship, often referred to as a "master-details" or "parent-child" relationship, is the most usual relationship between two tables in a database. Common examples of this relationship include customer/purchase data, patient/medical-record data, and student/course-result data.
For example, each customer (Master table Customers) is associated with at least one order record (Details table Orders). Valued customers have several order records and often a user needs to view one table in connection with the other.
Master-details relationships are commonly used in applications. In ASPRunnerPro, you can join or link several tables that have at least one common field. You can Add/Edit the records of the linked tables on the same page in the generated app.
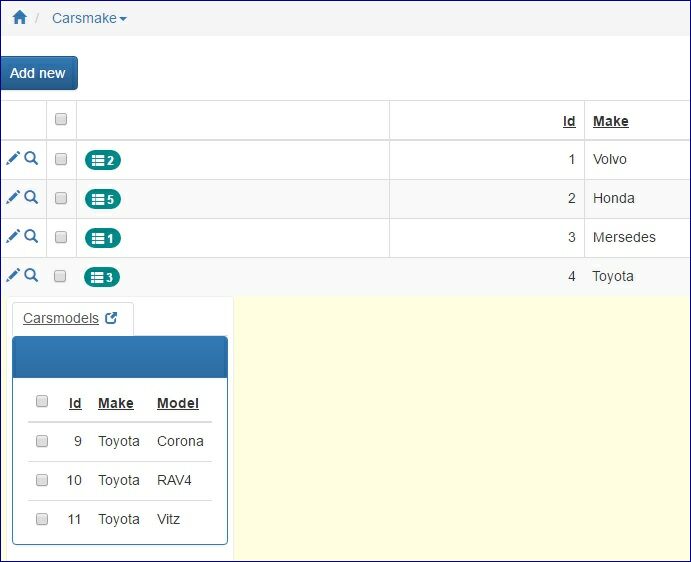
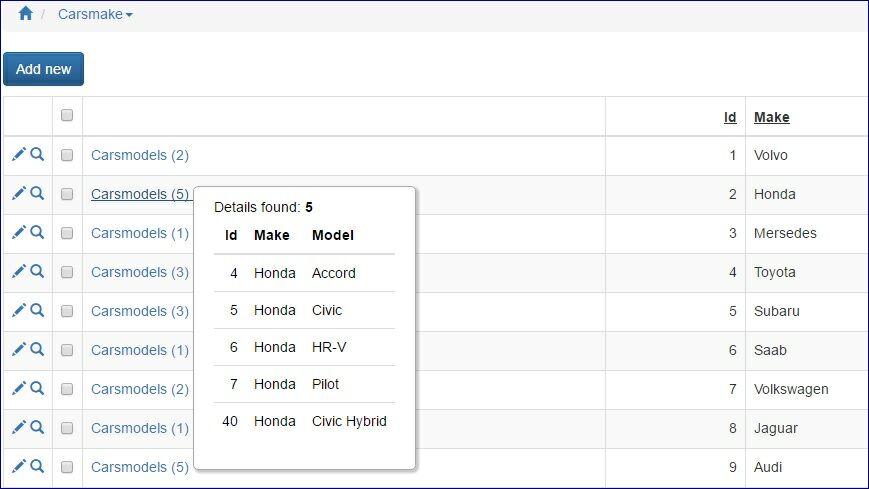
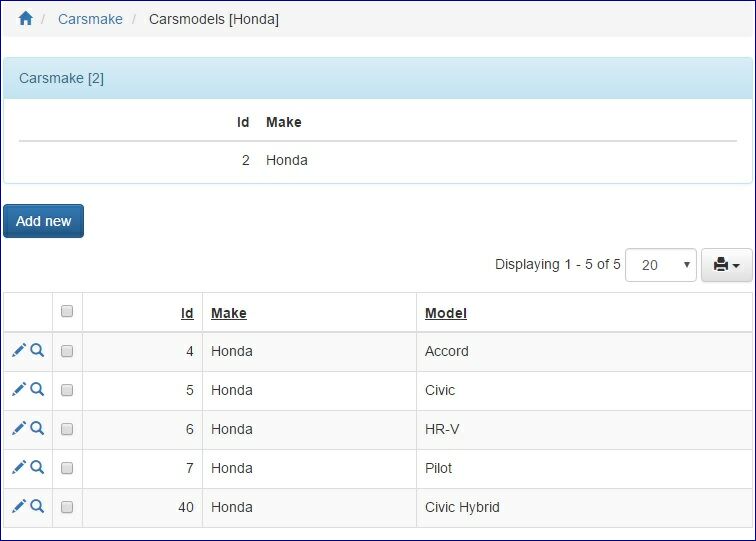
Here is an example of a Master-details relationship between the Carsmake and Carsmodels tables, where the details table shows the models for the selected make.
Note: one master table can have multiple details tables. You can display data from multiple details tables on the same page.
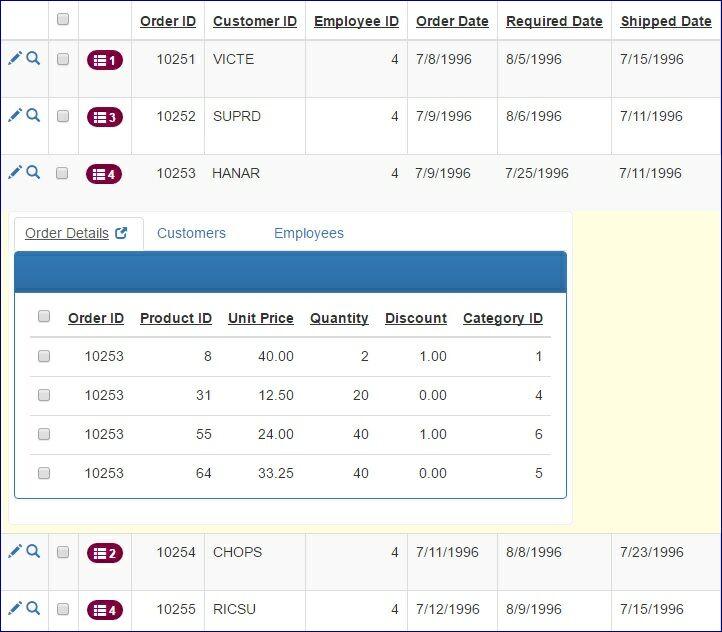
For example, you can display the customers, their orders, order details, and edit all three tables at the same time without leaving the page.
Setting up the Master-details relationship
To create a master-details relationship in ASPRunnerPro:
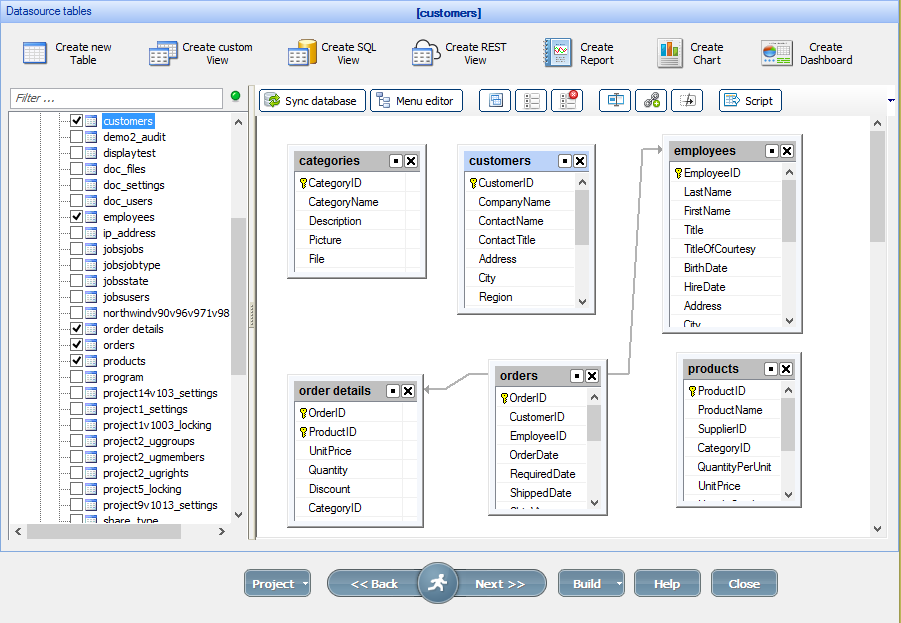
1. Go to the Datasource tables screen and enable the tables you wish to link in the left panel.
2. Drag a field from one table to another.
Note: when dragging a field, other fields of the same type become highlighted in bold.
The Table link properties dialog opens. The options are described below.
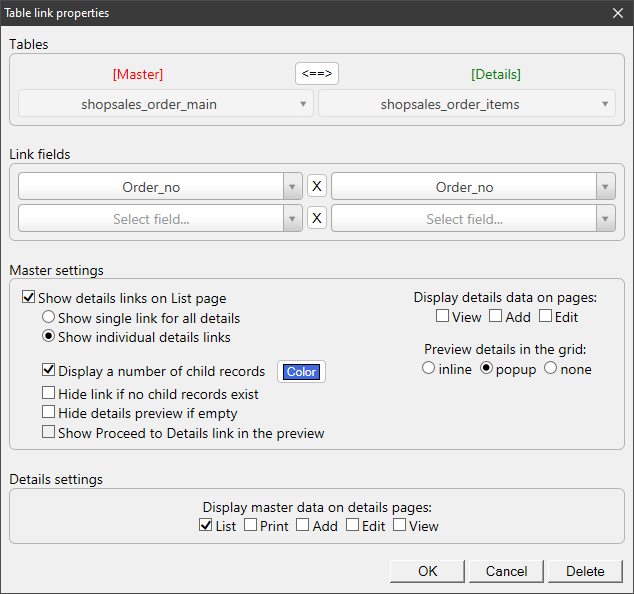
3. Choose which table is the Master one and select the link fields for both tables.
Note: make sure that the link fields are of the same type.
4. Set up the Master and Details settings. If you'd like to display the master table data on the details page, select the corresponding checkboxes. Click OK.
Note: starting with ASPRunnerPro version 10.3, you can also Hide details preview if empty.
5. The master-details relationship is created and displayed as an arrow between the tables.
Examples of the Table Link Properties options
Here is how the Table Link Properties window looks like:
Here are some of the examples for the Table Link Properties options:
Show single link for all details:
A link for details is displayed as  icon. Click it to view the details tables. Use this option if the master table has multiple details tables.
Show individual details links:
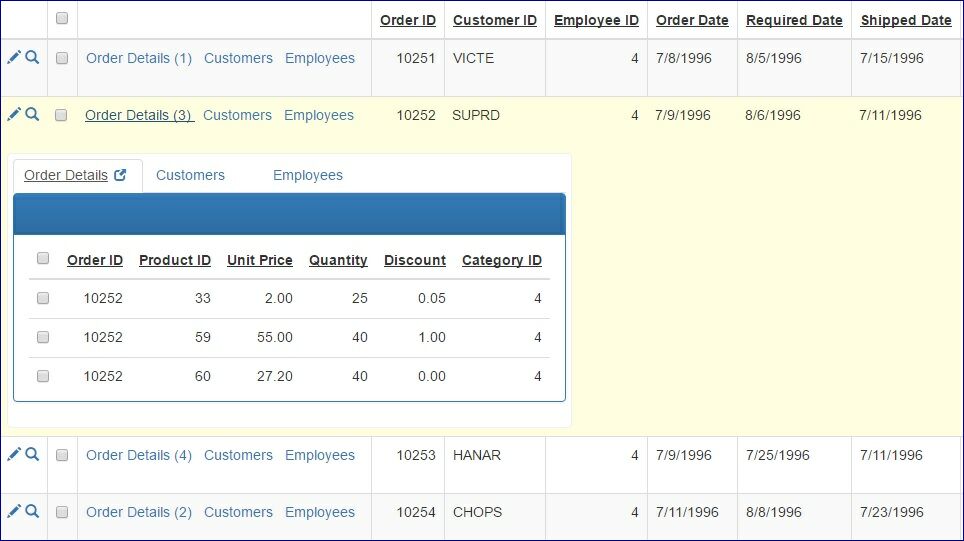
Preview details records in popup:
Note: If you select to display details records in a popup, you can define the popup appearance in the Editor -> Details preview screen for the details table.
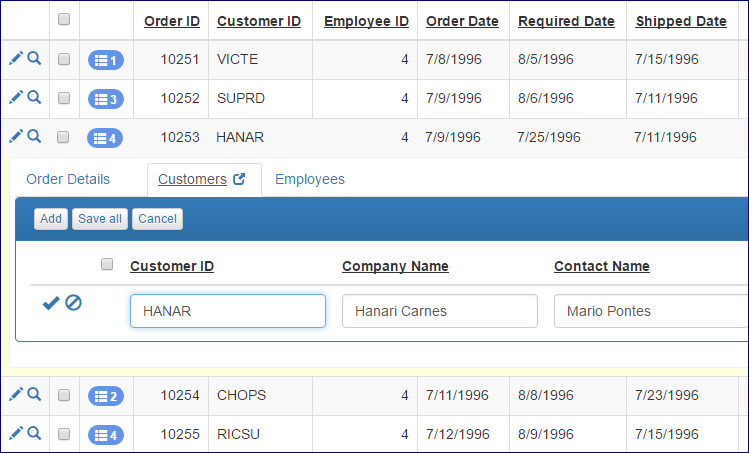
Preview details records inline:
If you select to display the details records inline, you can add/edit/delete the details in an inline mode on the master table page.
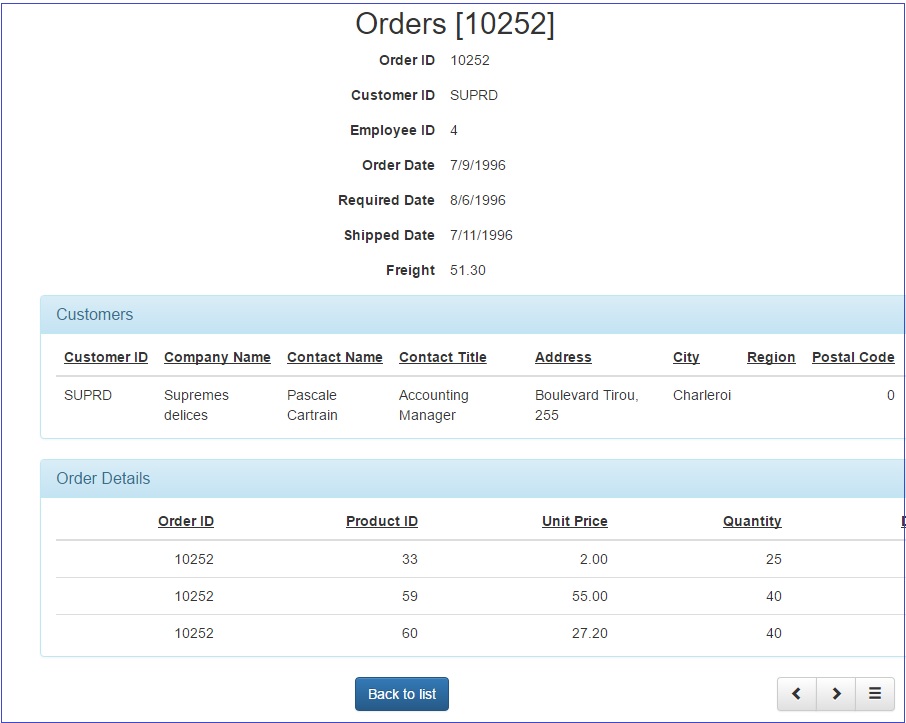
Display details records on the View/Add/Edit page:
Hide details preview if empty:
This option allows you to hide the details preview on the master table View/Add/Edit page if the details table does not contain any records for the current master table record.
Display master table data on the details page:
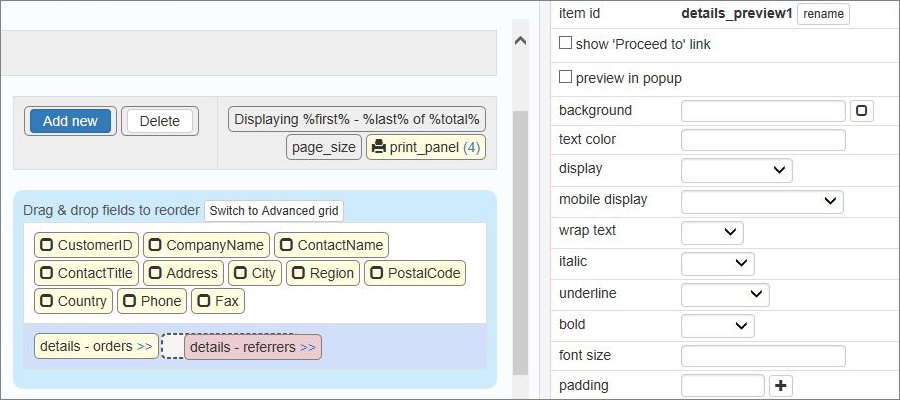
Changing the order of details tables
If a master table has two or more details tables, you can re-order the details tables as well as choose the orientation (vertical or horizontal). You can do that in Page Designer.
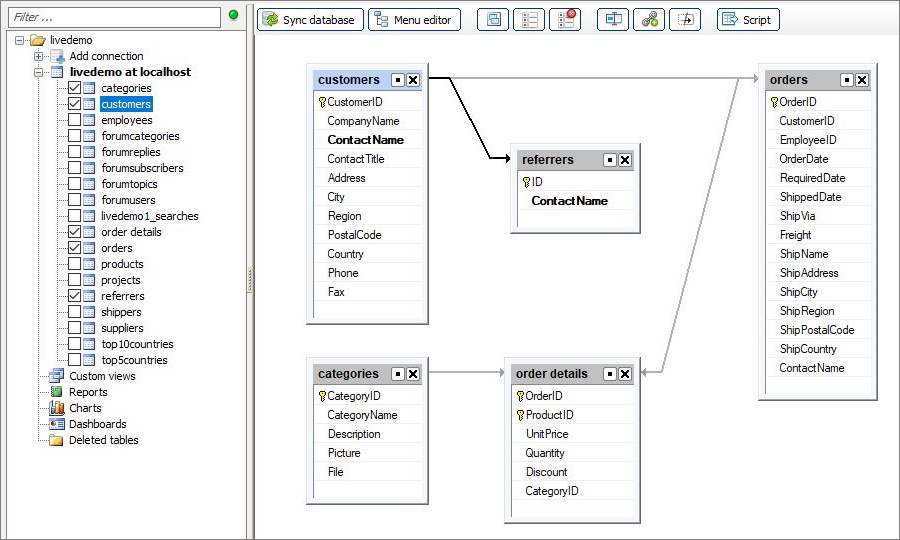
Here is an example of a "customers" table that has two details tables: "referrers" and "orders".
Proceed to the Page Designer to change the order of the details tables using drag-n-drop:
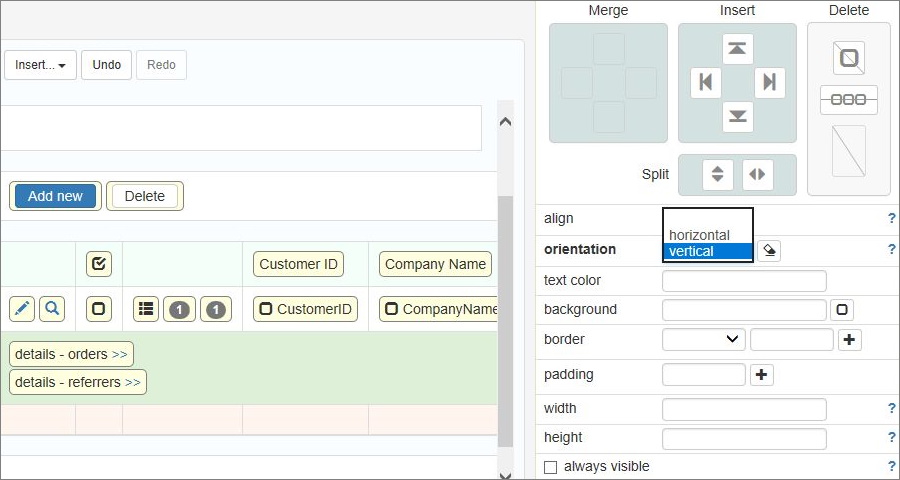
To change the details tables orientation, switch to Advanced grid first. Then click on the details tables cell to open the Cell properties and choose the orientation:
Printing the master table data with the details
You can print the master table data on the List page with the data from the details tables. Click the Print icon and select the corresponding checkboxes to do so.
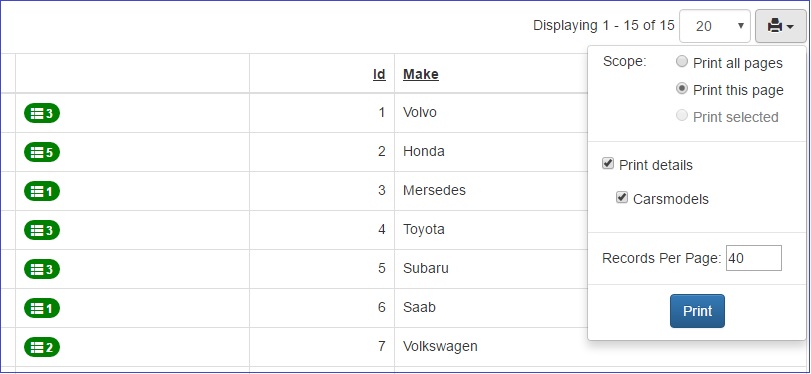
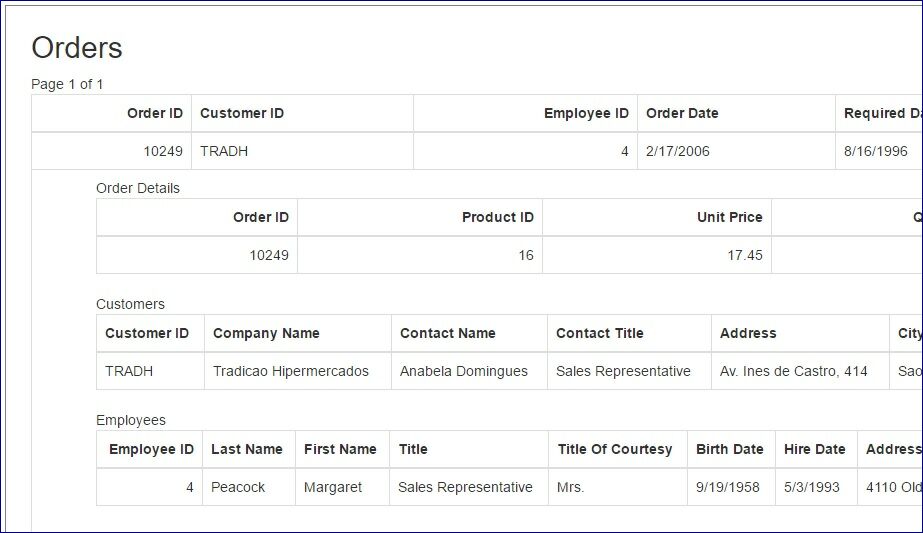
Here is an example of a page to be printed:
Charts and reports as master and details tables
You can use charts and reports with master or details tables.
A chart as a details table:
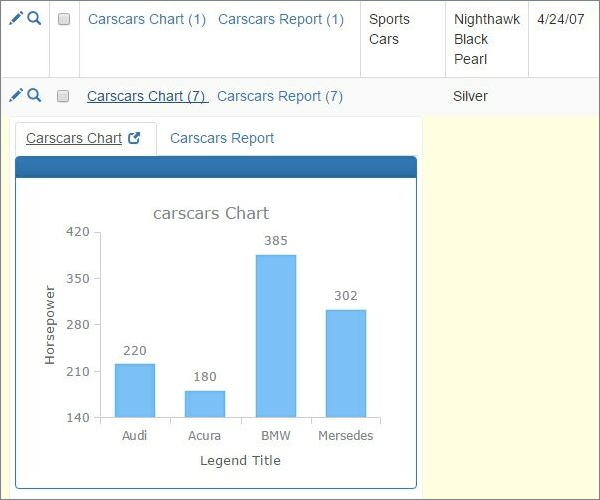
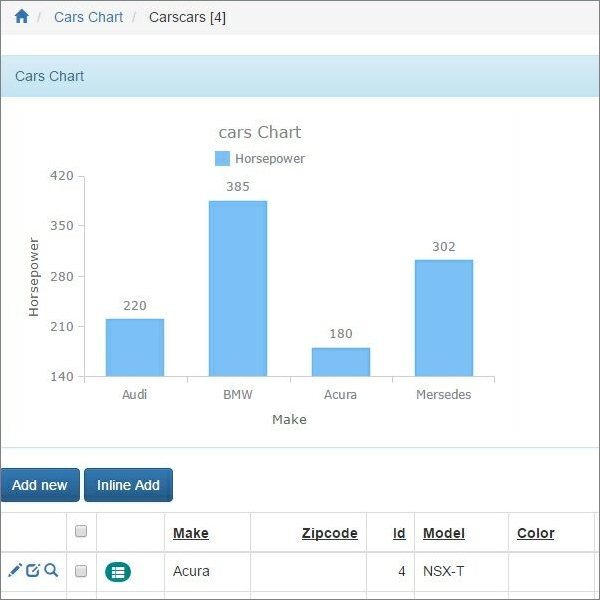
A chart as a master table:
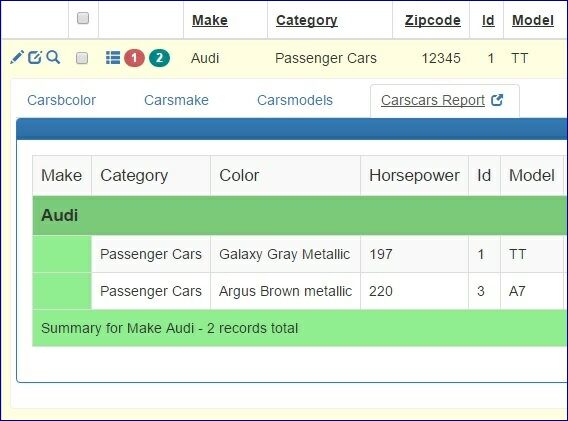
A report as a details table:
See also: