Quick jump |
Once REST API connection is created we can proceed to creating REST Views. What kinds of views to create - depends on the API itself. For instance, Football API offer the following "resources": competitions, matches, teams, standings, and players. It is natural to create the same REST Views in your project. In this specific project, we are creating Matches and Teams views.
Configure URL, execute the List request, add fields
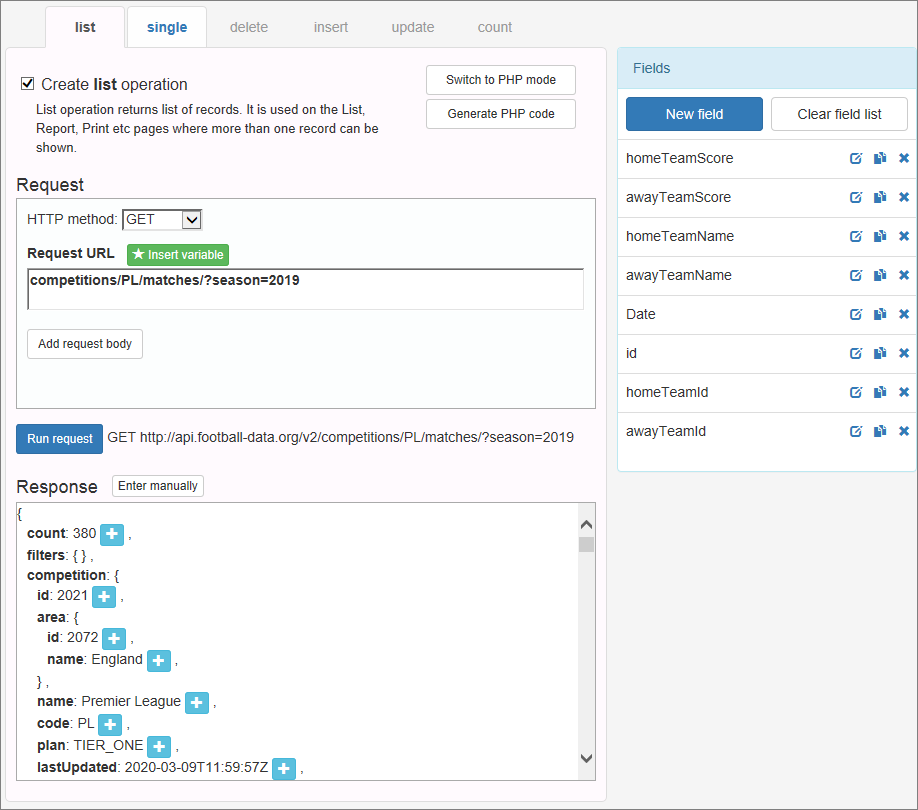
REST View setup, List operation.
Note: "Run request" button will be hidden if you use OAuth or Custom REST connections. These kind of connections can be executed in PHPRunner. You need to execute the request manually and then paste the resulting JSON into the Response window.
You can see that in this view we limit it to season 2019 of the Premier League. This is where we found some sample requests.
You enter the Request URL, it gets added to the base REST API URL and shows the actual request being performed. If your URL is correct, run the request and get the response back in JSON format. You can see it in the Response area. Retrieving and parsing the response may take a bit of time, depending on the API. You can also copy and paste the sample JSON response from the
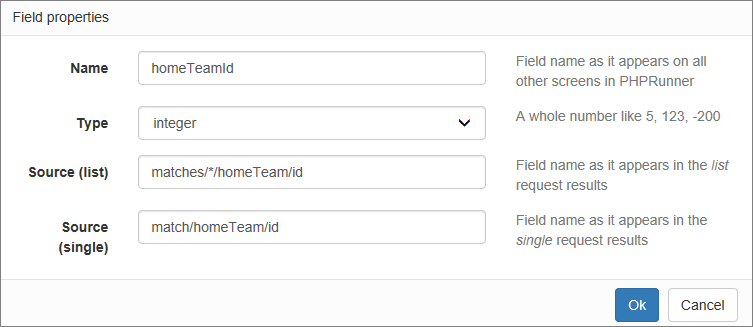
Now there is time to add fields. The easiest option is to use a plus button in the Response area. Make sure you are finding the correct field in the response. For instance, in this response, there is also competition info, season info, venue, referees etc. Again, it all depends on the specific API. Once we found and added our fields we also need to assign meaningful names to them. There might be several fields named ID, Name. We'd rather deal with names like homeTeamName, awayTeamName etc.
Here is how the field settings are going to look at this moment. Your job is to assign it a meaningful name and make sure that the correct data type is selected.
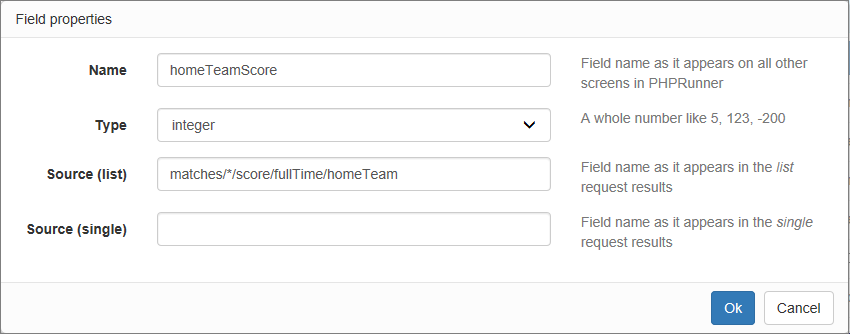
* in Source(list) means a list of items, for instance, matches/*/score/fullTime/homeTeam means a list of matches where * will be replaced with real IDs like 1, 2, 3 etc. You don't need to worry about the syntax as our software handles this for you.
Now you can build your project, run it and you will see the list of English Premier Leagues from season 2019 on your screen. Isn't it cool? This is your first REST API View and it works!
Now you can choose what fields to show on the List page and in which order, choose what fields to make searchable, what 'View as' format to use etc. In other words - the rest of the software works exactly the same way as at did with data coming from the database.
Configure URL for the Single operation, execute, add fields
Next step - let's create a Single operation, which is basically a view page. Proceed to the Pages screen and choose id as a key column. Again, this name depends on the API you use and may be different in your case.
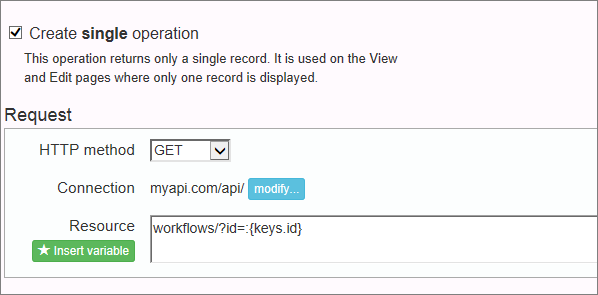
Go back to REST View setup screen and enable Single operation. From the REST API docs we can see that a single match request looks like this: https://api.football-data.org/v2/matches/xxxxxx where xxxxxx is our match id, received via List operation. So, into the Request URL field we enter matches/ and then use 'Insert variable' to select keys.id variable.
Now we can run this request. Since we use a parameter there the software will ask you to provide one. We can go back to the List operation screen and copy match id (264341) from there.

Now you do the same thing - add fields from the Single operation response. If REST API is well designed and fields named in a similar manner then it will simply populate Source (single) part of the field properties.
In some cases, the software won't recognize that the field was created already and will add a new one like id1, id2 etc. In this case, proceed to id1 field properties, copy Source (single) path and paste to id field Source (single) part. After that id1 field can be safely deleted.
Once you do this for all fields you need to appear on the Single (View) page, proceed to the 'Pages' screen, enable 'View' page and build your project. You can now access the View page from the List page.
Note: when you specify Resource for the single operation that requires passing an ID use the name of key column field prefixed by keys. i.e. :{keys.id}
Example:
Creating Teams view and linking it from Matches view
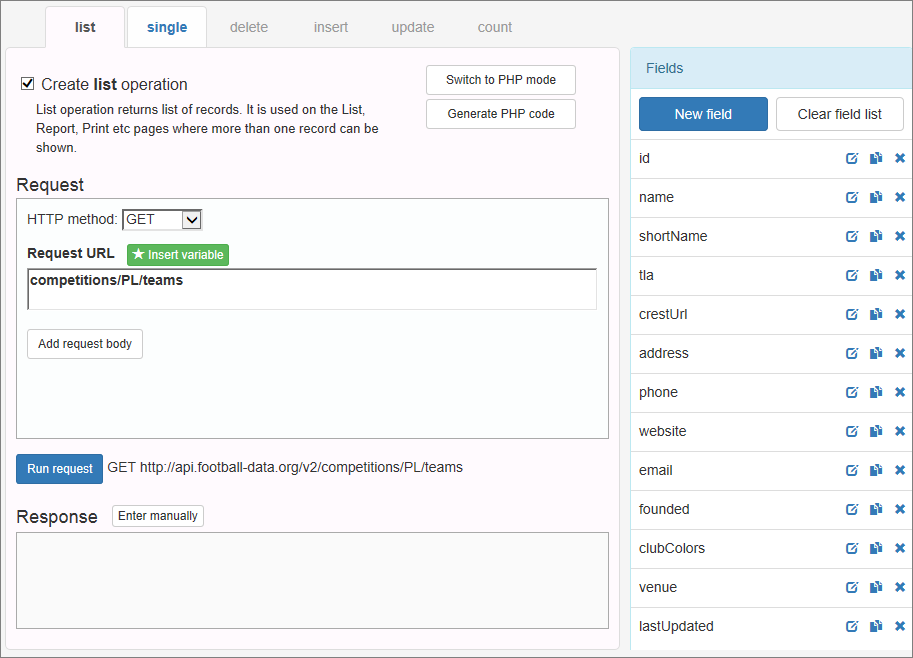
Let's create a similar REST View for the Teams. I will just show screenshots of how List and Single operations should look.
List operation:
Single operation:

You can add Team fields the same way as described in the Matches View section. Now let's go back to Matches List View and make sure that both Home Team ID and Away Team ID appear on the List view.
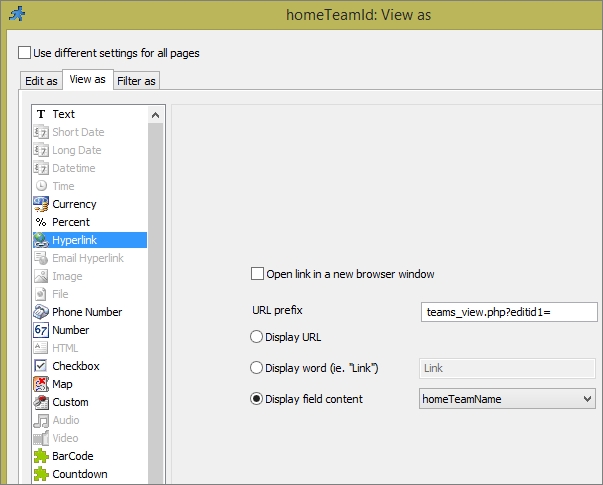
Proceed to homeTeamID 'View as' settings and configure it as a link that points to the corresponding Teams View page.
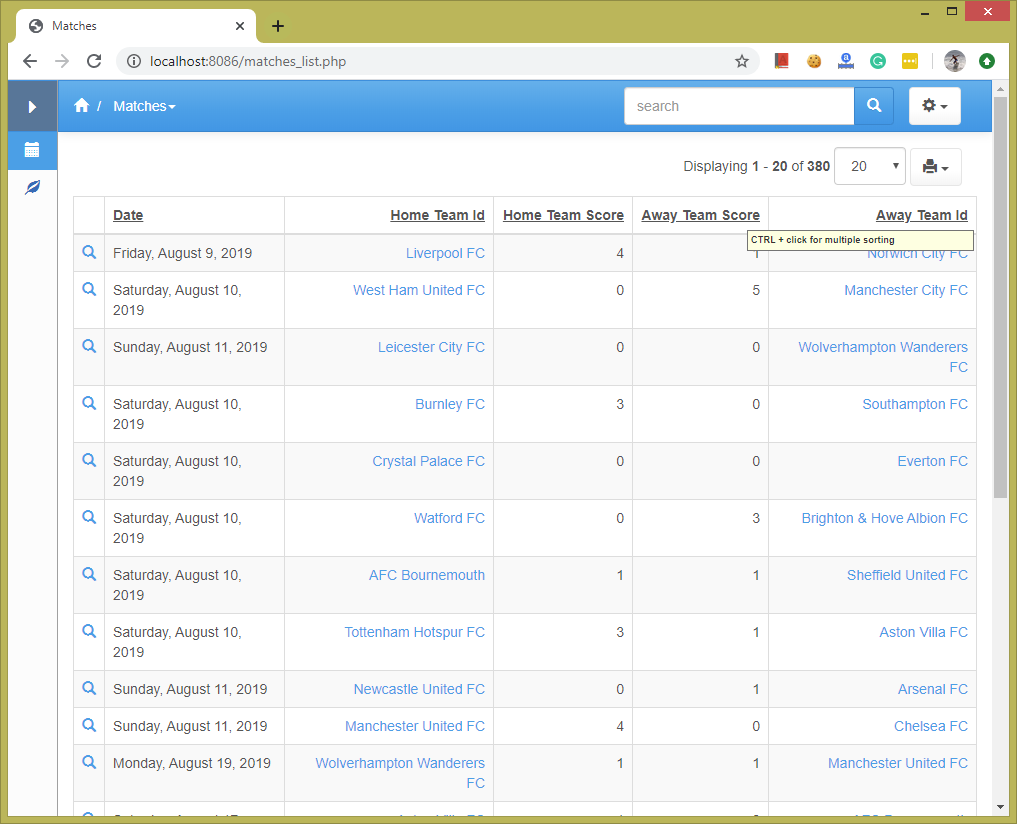
This is pretty much it for now. Now if you build your app and run it in the web browser you will see something like this.
Insert, Update and Delete operations
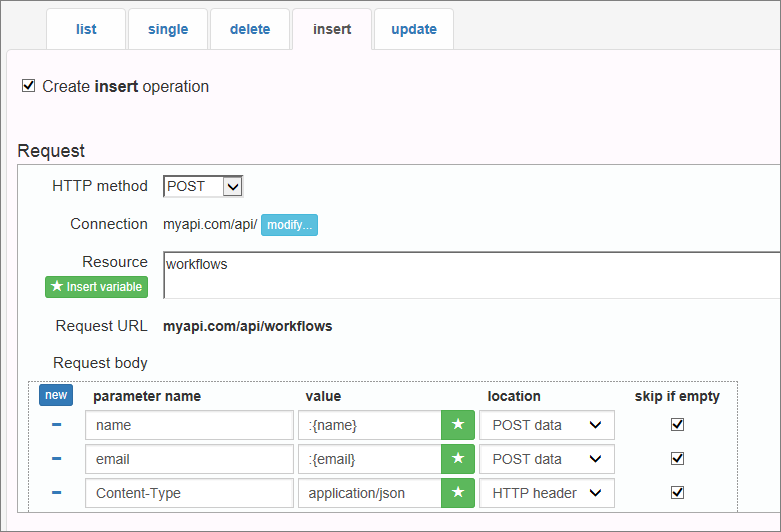
For any POST request like INSERT, or UPDATE, or DELETE, POST data will be sent as application/x-www-form-urlencoded, which is a standard way to send form data to the server.
If you need to change this behavior, add a new parameter with name Content-Type and location HTTP header. Possible values are multipart/form-data or application/json. You will need to consult your REST API provider documentation to see what format they expect.
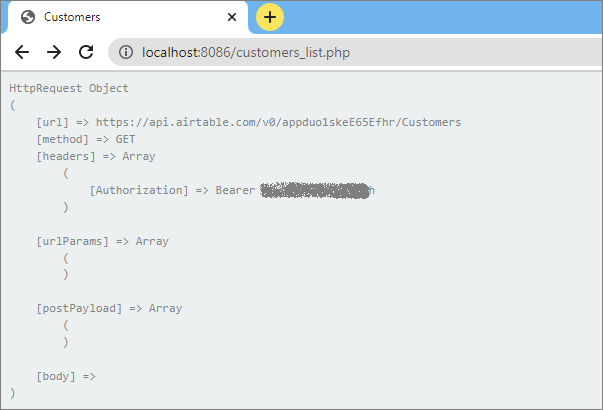
If you need to see all requests sent to the REST API provider ue the technique explained Troubleshooting tips article. Sample output:
See also
•Working with Airtables REST API