What is a REST API? REST is an acronym for Representational State Transfer — an almost meaningless description of the most-used web service technology! A REST API is a way for two computer systems to communicate over HTTP in a similar way to web browsers and servers.
REST API Connection requires you to enter REST API URL, select the name and authentication method. Most REST API services require some sort of authentication in order to provide access to their resources. Sometimes they ask for username and password, sometimes they require so-called API key parameters. PHPRunner can handle several types of authentication out of the box.
Authentication
None
No authentication at all.
API Key
Users are assigned their own API keys, a sequence of letters and numbers, that should be passed with each request to the REST API server.
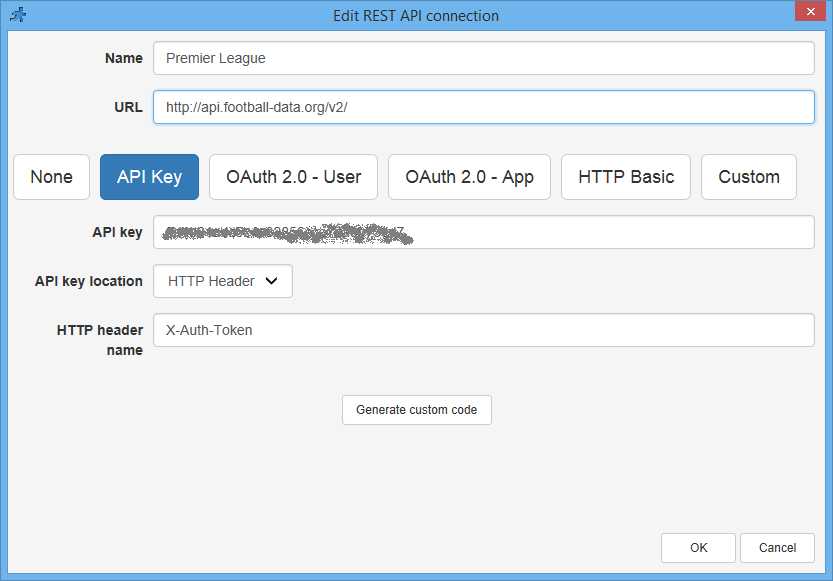
API Key is one of the most common API authentication options. API key will be provided by your API vendor.
OAuth 2.0
OAuth 2.0 is a current industry standard for secure authentication. While there are many subtypes of it, the main principle is that the user receives an access token as a result of authentication and then adds it to each request to the REST API. There are two main scenarios of OAuth 2.0 authentication.
OAuth 2.0 - User
With this method your users, not you, authenticate with the REST API provider themselves and get access to their own data. For example, you can create a website where users would be able to read and write their own Google mail or see their Facebook feed. This method is much more complex than others, as it involves interaction between multiple web sites in the browser and additional setup with the API provider. When your user first accesses the page based on such REST API, the ASPRunnerPro application redirects him to the API provider website, where he enters his username & password. The provider then generates authorization code and sends it back to the ASPRunnerPro app. The app then uses that code to access the user's data. When setting up such an authentication method on the API provider's site, you need to specify the URL of your app that should receive the authorization code. It is usually called "Redirect URI" and it should be something like this:
Something like this will work for local testing:
https://your.website.com/app/oauthcallback.asp
Something like this will work for local testing:
http://localhost:8086/oauthcallback.asp
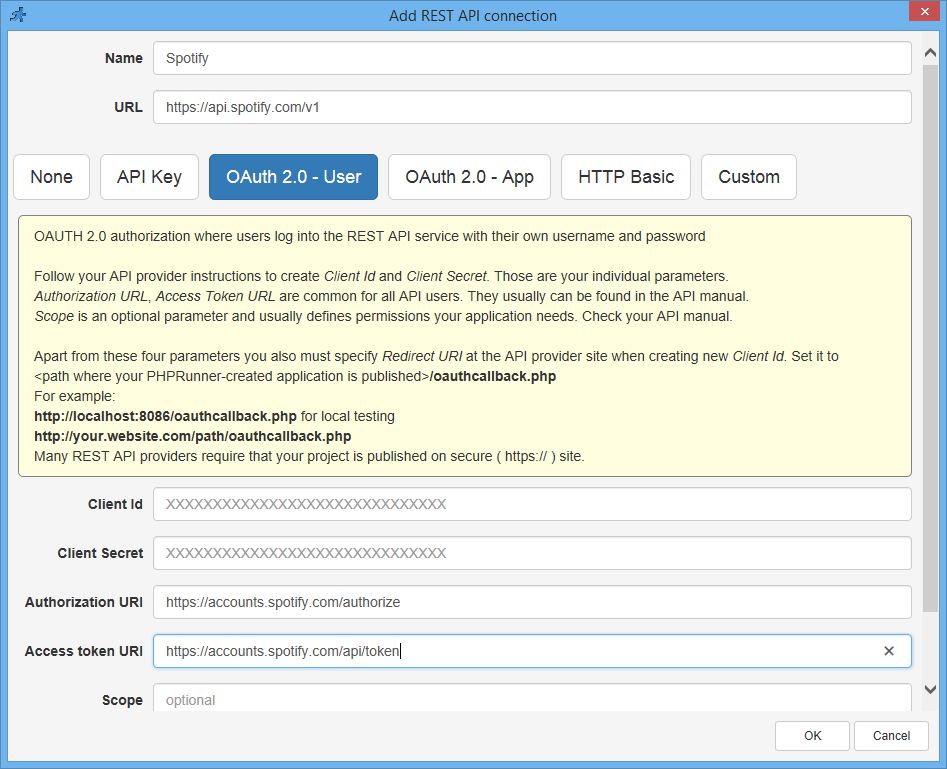
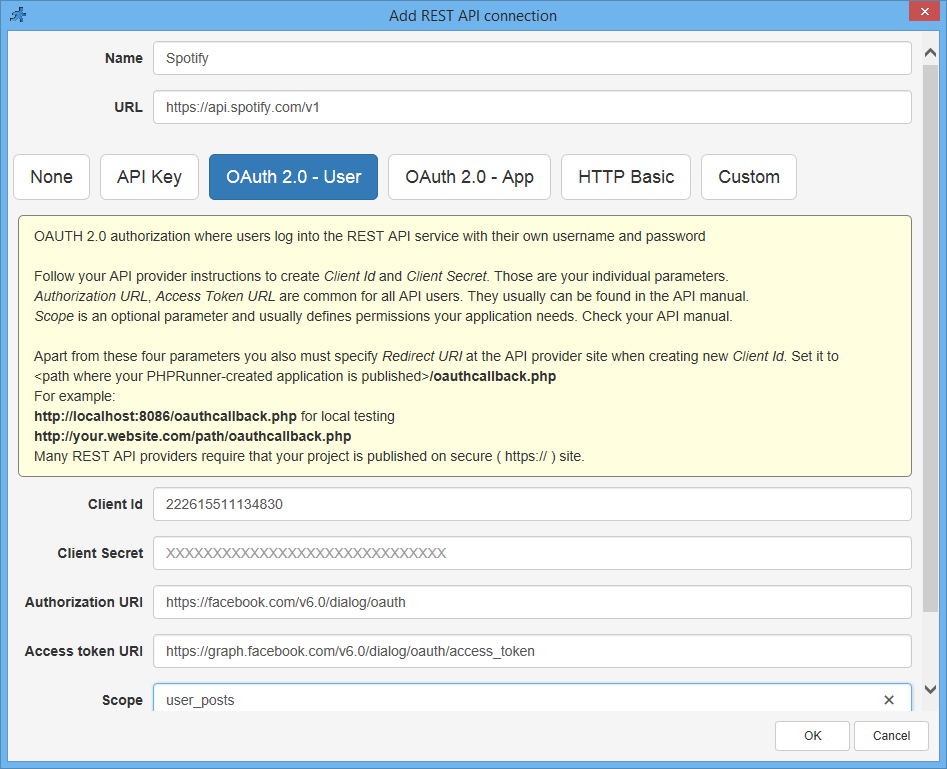
OAuth 2.0 - User example: Spotify
This is how it should look in REST API connection settings:
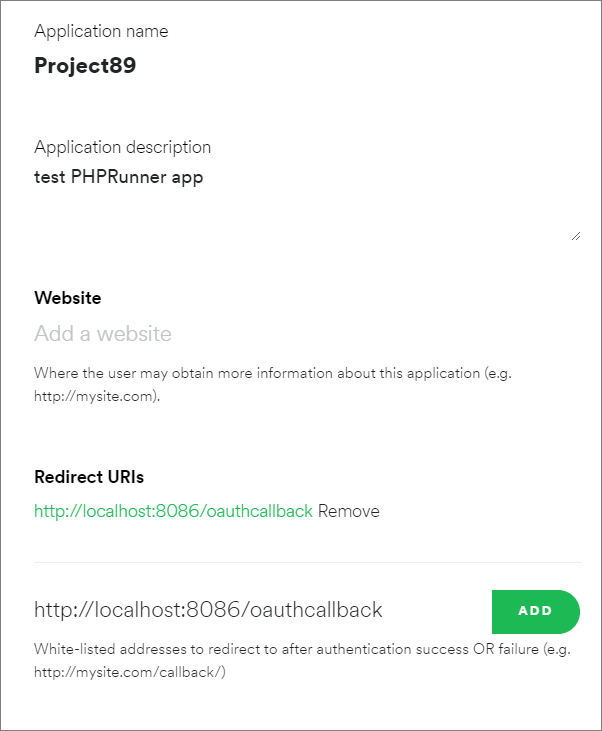
This is how it should look on the Spotify side. The most important setting here is the Redirect URI. For local testing it is usually http://localhost:8086/oauthcallback.asp
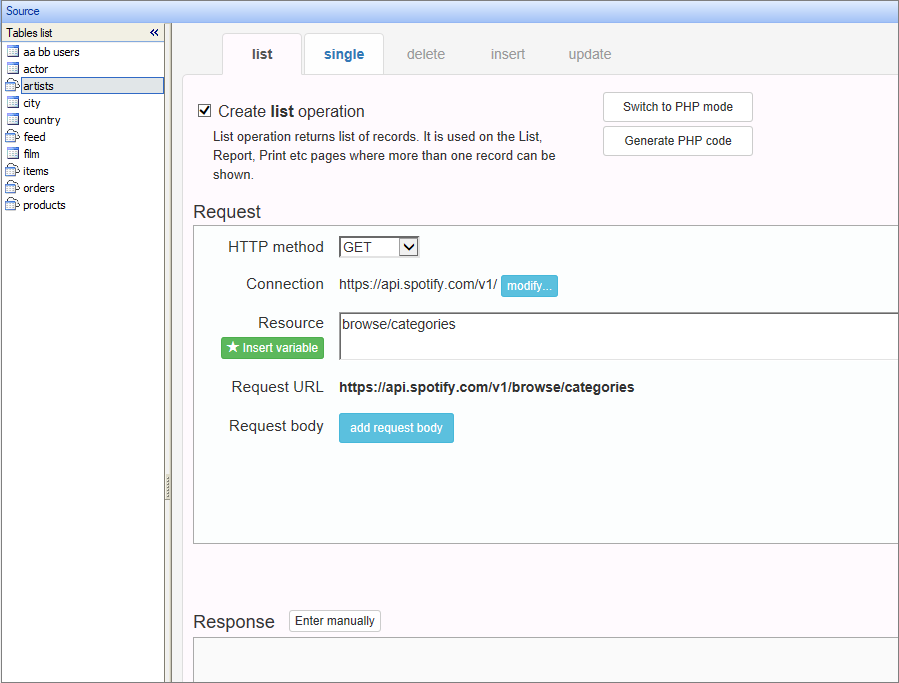
And a sample REST View that lists songs categories.
Note: "Run request" button will be hidden if you use OAuth or Custom REST connections. These kind of connections can be executed in ASPRunnerPro. You need to execute the request manually and then paste the resulting JSON into the Response window.
OAuth 2.0 - User example: Facebook
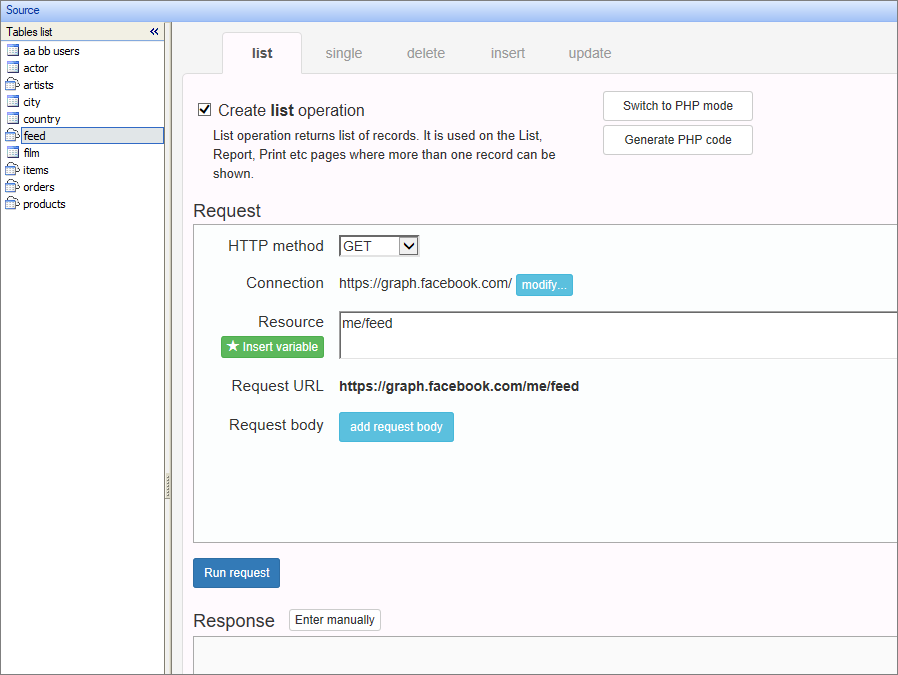
REST Connection and View setup
Important: scope, Facebook, for instance, won't show any pictures if correct scope is not specified.
Facebook app settings on their website
Important:
1. Site URL - should point to your website URL
2. In development switch. In development mode you cannot use scope user_posts. Also it will require that your website runs under HTTPS so you won't be able to test most of things locally.

And here is the sample REST View setup based on Facebook feed.
OAuth 2.0 - App
This is the method where you, the creator of the web application, have access to some data at the REST API service, and you want to show that data on your web site. Only you, or your application is a client of the REST API. This method is not much different from API key or Basic HTTP authentication, only it is more secure.
Basic HTTP
Username and password should be passed with each request. When you open a web site, and the browser shows a dialog labelled "Authentication required" prompting for username and password, that's it, the Basic HTTP Authentication, standard, simple method of access control. Wikipedia provides more info about Basic HTTP authentication.
Custom
When a REST API provider uses some other method to verify users access, you can use custom code to implement that type of authentication. Fortunately you don't need to write it from a scratch, but use one of the standard methods as a base. There is a "Generate code" button on each authentication type screen that creates code implementing that type in the Custom section. Generate the code and then make a change or two to meet your requirements.
For instance, your API may require username and password to be sent with each request in the URL parameters like this:
http://api.server.com/cars/all?username=jack&password=JacksPassw0rd
Take API key authorization as an example, enter your username into the API key box, choose URL as location and put "username" into 'URL parameter name'. Then press Generate code:
$key = 'jack';
$name = 'username';
$request->urlParams[$name] = $key;
As a result of this code, parameter username=jack will be added to each API request. All you need to do is to add password as well:
$request->urlParams[ "username" ] = "jack";
$request->urlParams[ "password" ] = "JacksPassw0rd";
You can also access and modify this code on the Events screen, in the REST API section